
We will learn how to create a PhonePe account in this tutorial. With just one click, you may use PhonePe to send and receive money to and from your bank account when conducting financial transactions online. You must first create a PhonePe account in your name before you can conduct an online transaction. In only five minutes, I will walk you through the process of creating a PhonePe account. If you want to learn everything there is to know about creating a PhonePe account, read to the end.
Quick Answer
Download the app, enter the mobile number associated with your bank account, then confirm using the OTP to set up PhonePe. To make and receive payments with PhonePe, finish your profile by adding your bank account, choosing your bank, and generating a UPI PIN using your debit card details.
You Need To Have The Following:
- Suitable internet connection.
- Any Indian bank account that is linked to UPI through this app.
- A mobile number that you will use to register on PhonePe, but make sure that the same number should be registered to your bank account.
What is UPI?
The acronym for Unified Payment Identification is UPI. You can send money with this 4-6-digit secret code. You are unable to send money without this UPI. All you have to do to create a UPI ID is enter your bank account information and designate an ID that will serve as your UPI ID. The fact that UPI can be utilized at any time and from any location is its strongest feature. To put it simply, it is a 24-hour service.
How To Create A PhonePe Account?
It only takes a few quick steps to set up a PhonePe account. To learn how to create a PhonePe account on your phone, follow these steps:
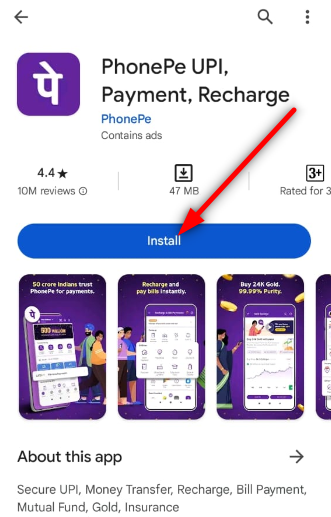
Step 1: Download the PhonePe App
First “download and install” the PhonePe app from the Google Play Store or App Store.
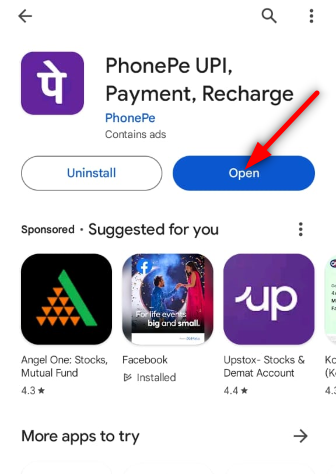
Step 2: Open the PhonePe App
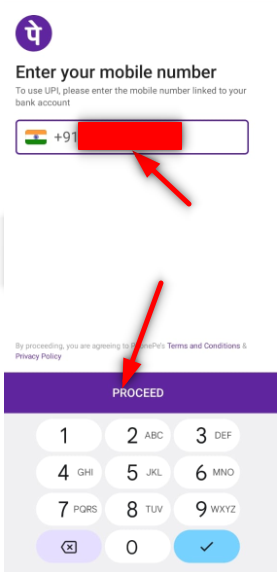
Next, open the PhonePe application. An interface requesting your mobile number will appear when you open the PhonePe app. In order to link your PhonePe, you must “enter the same mobile number linked to your bank account.” Even after creating a PhonePe account, you won’t be able to make or receive payments or complete any transactions if the cellphone number you supplied isn’t connected to the bank account that was used to create the account.
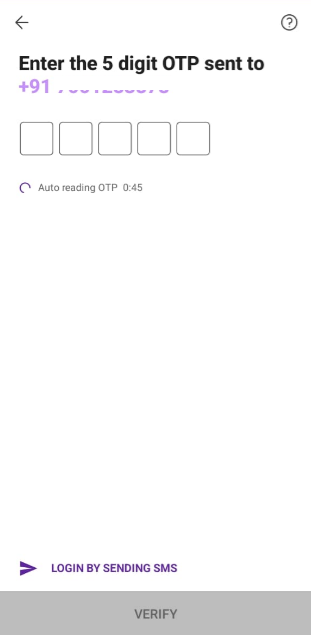
Step 3: Phone Number Verification
Once you have entered the mobile number, click on the “PROCEED” option. You will receive an “OTP on your mobile number”, which is automatically fetched by the system. If it doesn’t, enter it yourself, and then the verification of your mobile number will be completed.
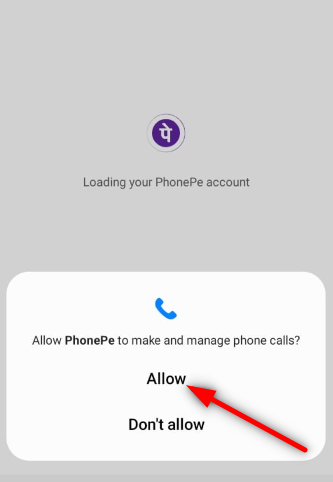
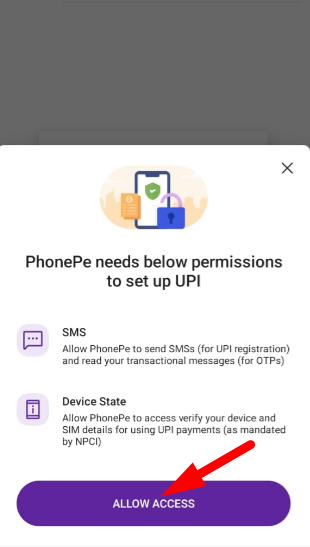
Step 4: Allow Permissions
You must “Allow” the permissions that the PhonePe app requests. You will notice a lot of options that will let you do a lot of things, but since you haven’t connected your bank account yet, you won’t be able to do any transactions, pay for anything, or get money. Now let’s finish your profile.
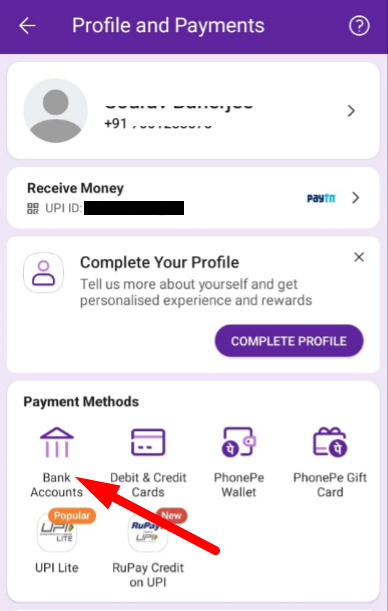
Step 5: Complete Your Profile
To complete your profile, click on the “Profile” icon in the upper left corner of the home screen. Now click on the “Bank Accounts” option in the “Payment Methods” tab.
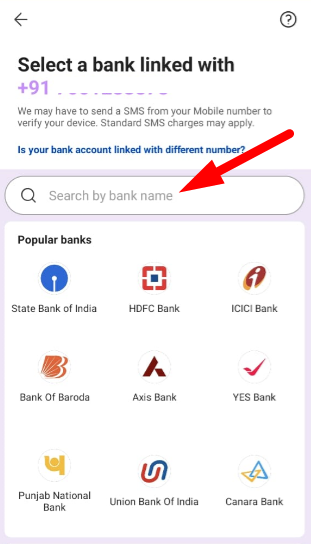
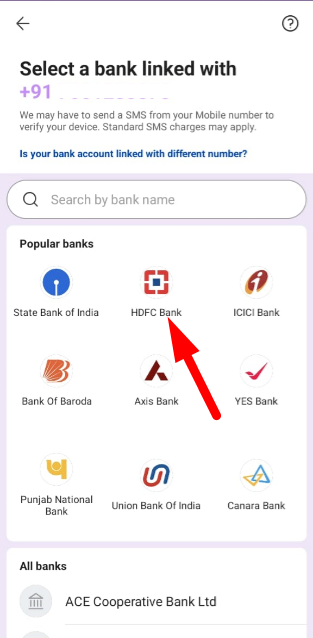
Step 6: Add a Bank Account
The “Add new Bank Account” option will now show up; select it. Next, find the name of the bank associated with the mobile number you used to open the phone account. For instance, search for and choose HDFC Bank if you want to link your mobile phone to a bank account there.

Step 7: Account Verification
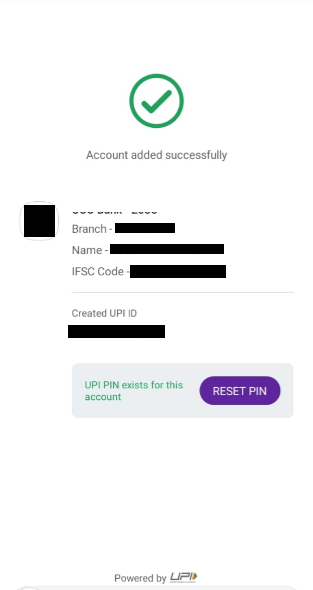
The bank information will be automatically retrieved by the system, and the account will be successfully added.
Step 8: Account Setup Complete
Now it is time to create the UPI PIN. Click on “Create” or “Reset” next to the UPI PIN.
At this point, you will be asked to enter your debit card information. Enter the “last 6 digits of the debit card number” and the “validity or expiration date” of the debit card in months/years and click on “Verify”. Then enter your “debit card PIN” and “set the desired UPI PIN” to be used for each transaction on PhonePe. You can now make/receive payments.
How To Add A Bank Account On PhonePe?
Steps To Follow:
Step 1: Go to the Home Page. Now you need to add your bank account in PhonePe App. Click on ADD BANK ACCOUNT to add a bank account. You can send or receive money and also check the balance in your bank account after adding your bank account to the PhonePe app.
Step 2: Select and click on the name of the Bank, from the list or search for your Bank’s name, in which you have your bank account registered with the mobile number you have created your PhonePe account with. If your mobile number is registered in more than one bank, then select the bank account, you want to connect with your Phonepe.
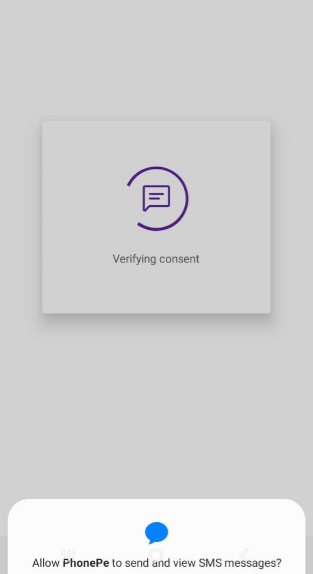
Step 3: Now, if you have only one sim in your mobile then click on SEND SMS and if there is more than one sim, then click on CLICK HERE, select your suitable sim, and click on SEND SMS. An SMS will be sent from your mobile number automatically as soon as you click on SEND SMS. Make sure that you have sufficient balance in the sim you are using. The mobile number you select should be registered in your bank account.
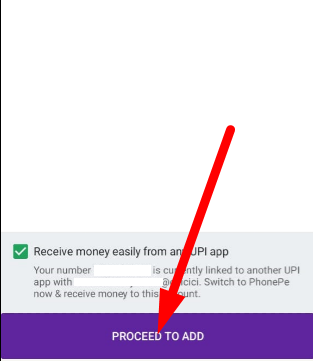
Step 4: After the mobile number is verified, you will be able to see your Bank account details such as Branch name, IFSC code, etc. Now, you have to set a UPI ID. You can see an automatically generated UPI ID, if you want to change it, then click on EDIT. After that click on PROCEED TO ADD.
Step 5: Your mobile number will automatically come here. Now, if you want, you can enter your name by clearing the mobile number. But make sure whatever you write must be a unique one. I recommend you keep your mobile number remain here. Then click CONTINUE.
Step 6: Now you have to set a UPI PIN. You have to provide these PINs while doing the transaction. To set UPI PIN, click on SET UPI PIN and submit your ATM / Debit Card details such as the last 6 digits of your ATM card number, and validity period and then click PROCEED. Now, set a UPI PIN. If you have set UPI ID earlier once, then click on the option RESET PIN.
❗ IMPORTANT: Memorize your UPI PIN, because you will be required to provide your UPI PIN every time you transfer money or check your bank account balance. Never share this UPI PIN with anyone. It is very sensitive information to initiate any transaction in your bank account with PhonePe app.
Step 7: You have added your bank account successfully. Now, send or receive any amount at any time from anywhere with PhonePe app. You can also check your bank account balance. To check your bank account balance, click on Check Balance from the Transfer Money section on the Home page of the PhonePe app. Now, you will be able to see your bank account name, click on it. Now, fill in your UPI PIN and it will start fetching your bank balance. You will be able to see your bank account balance.
Step 8: To do any transaction successfully, you have to first complete your KYC. To do that, click on FINISH SETUP in Complete your Profile section or click on PhonePe Wallet. It will ask for your KYC documents such as your PAN Card Number, Name, etc. You also also choose to change your KYC document for example, Driving License, Voter ID Card, Passport, etc. Fill in all the KYC details and click SUBMIT.
Step 9: Now you have to make the first payment. You will get a cashback of up to 100 rupees on your first payment. In the first payment, you can recharge your mobile, pay your bills, or transfer money. The only condition to receive cashback is that you must make the transaction only through UPI. You will get 50% cashback on your First Money transfer. What this means is that you will receive a cashback of Rs.100 when you send someone Rs. 200.
How To Remove A Bank Account On PhonePe?
To completely deactivate your PhonePe account, first you’ll need to disconnect your bank account from the PhonePe account and then deactivate the PhonePe account. Here are the steps below to do so:
Steps To Follow:
Step 1: Open the PhonePe app and click on the Profile icon at the top-left corner.
Step 2: On the next page, click on View All Payment Methods under the Payment Instruments section.
Step 3: Click on the bank account you want to remove.
Step 4: Scroll down the page and click on Unlink Bank Account.
Step 5: Click on UNLINK on the pop-up that comes up.
How To Transfer Money Via PhonePe?
Here are the steps to transfer money to your friends or family via PhonePe:
Steps To Follow:
Step 1: Click the option To Mobile Number or To Bank/UPI ID under the Transfer Money section on the home screen of PhonePe App.
Step 2: You need to search or select a contact name, UPI number, or UPI ID.
Step 3: Enter the suitable amount you want to transfer and tap the option PAY.
❗ Note: The bank account from which you will transfer the money will be displayed next to Send option. If you want, you can change the bank account by selecting the bank account from the dropdown box.
Step 4: Finally, enter your UPI ID to complete the transaction.
Step 5: Money will be sent successfully and you will get the successful message displayed on the Phonepe App screen.
How To Delete PhonePe Account?
Here is the complete guide to deleting your existing PhonePe account:
Steps To Follow:
Step 1: First, open the PhonePe app on your device and Tap on the question mark in the above section (?)
Step 2: Now go to the Help section choose Profile and tap on My PhonePe Profile option.
Step 3: Then click on My PhonePe account Details.
Step 4: Now you have to select an option from the list like ‘I am not happy with PhonePe’.
Step 5: Now in the Contact Support section choose a select language.
Step 6: At last answer all your problems related to PhonePe.
Step 7: After completing all the above steps, the PhonePe support team will reach you through Phone call or Email within next 24 hours.
Step 8: After having a conversation with the PhonePe support team, your PhonePe account will be deleted or removed successfully.
Why We Should Use PhonePe App?
The main benefits of using PhonePe is all about its functionalities, general usability, and security.
PhonePe offers a variety of ways for you to send money. It is also the fastest transaction app ever created. The user can actually choose their preferred language to launch it thanks to its multilingual UI. The most distinctive feature of PhonePe is its Intuitive POS, which implies that since shop transactions can be completed using PhonePe’s specialized POS device, all merchants will find the app beneficial for their business as well. To put it simply, PhonePe is the one app you haven’t used in decades.
Conclusion:
In conclusion, there are a few easy steps involved in configuring the PhonePe application, from downloading and installing it to connecting the bank account and mobile number. The procedure entails inputting the bank account details, setting a secure UPI PIN, confirming the mobile number, and granting the necessary permissions. By following these procedures, users can use the PhonePe platform to send and receive money with ease.


![Can I Access My Husband's Verizon Text Messages [Updated]](https://techteachs.com/wp-content/uploads/2024/04/Can-I-Access-My-Husbands-Verizon-Text-Messages-Updated.png)